
Getting Started
Invite Tickety, set the two settings everything else needs, and pick what to build first.
This gets Tickety into your server and ready for anything else in these docs. It takes about two minutes.
You need to own the server or have Administrator in it: Discord only lets you give Tickety permissions you have yourself.
Invite Tickety
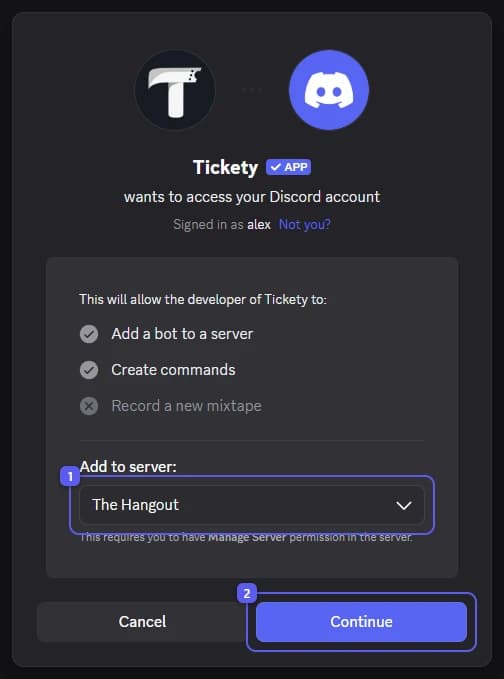
Open the invite link.
- Pick your server under Add to server.
- Press Continue.
On the next screen, keep every permission ticked and press Authorize. Tickety needs them to make ticket channels and post its messages.
Open Settings
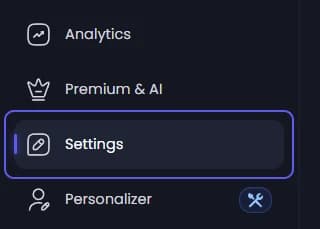
Open your dashboard, sign in with Discord and pick your server. Then click Settings in the sidebar on the left.
If your server is not in the list, see the dashboard does not list my server.
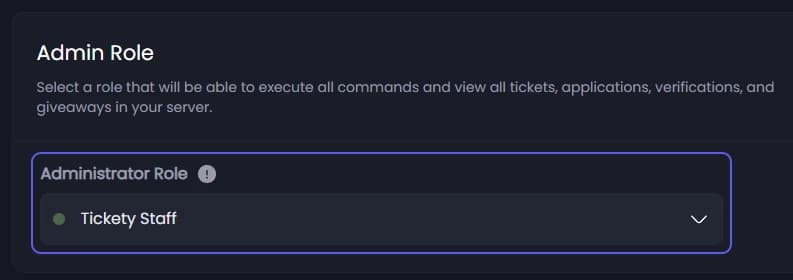
Pick the admin role
Under Admin Role, open Administrator Role and pick a role. A role is a group you give members in Discord, like Moderator.
Tickety opens no tickets and accepts no applications until this is set. Members with this role can handle all of them.
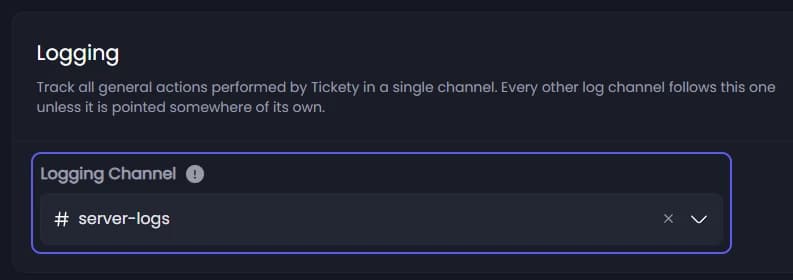
Pick the log channel
Under Logging, open Logging Channel and pick a private staff channel. Tickety logs what happens to tickets there: who opened, claimed and closed them.
Save
A bar slides up at the bottom of the page. Press Save Changes. Tickety is ready.
What to set up next
Create a ticket panel
The message members press to open a private support ticket. Most servers start here.
Create an application panel
Recruit staff with a form members fill in.
Give staff dashboard access
Let your staff use the dashboard without Manage Server.
Commands
Every slash command and what it does.